High performance PHP
One of the most common misconceptions about PHP is that it's an unsuitable language for demanding applications, websites which need to operate at scale, microservices architecture, or anything which requires asynchronous processing or event loops.
This misconception largely arises from the fact that PHP has traditionally been run in the majority of cases as an Apache module, or as a CGI process. This means that each request is handled by a new PHP process, which is then destroyed after the request has been completed.
Thus, despite the most modern versions of the PHP being incredibly fast and efficient, the overhead of starting a new process and loading scripts for each request means that a monolithic PHP application on a single server will be limited in its ability to handle concurrent requests.
Nonetheless, PHP is a mature language with a huge community and a huge ecosystem, and solutions exist to the problem of scaling PHP applications.
Options for scaling PHP
There are a number of options for scaling PHP applications outside this traditional architecture, including:
Swoole
Analogous to Node.js, Swoole is an event-driven asynchronous networking framework for PHP, delivered as a compiled extension.
It provides coroutine-based programming, which allows developers to write non-blocking code in an event loop system.
Swoole also supports the HTTP, Websocket, TCP, UDP, and MQTT protocols, among others. It can handle high concurrency and is suitable for building high-performance network applications.
Amp
AMPHP is another asynchronous concurrency framework for PHP, utilising PHP's native support for green threading (known in PHP as fibers).
It provides a set of reusable components in a high level API for building high-performance, non-blocking applications.
ReactPHP
ReactPHP is another event-driven PHP library that provides non-blocking I/O and asynchronous programming capabilities. It supports HTTP, Websocket, and TCP protocols, among others. ReactPHP is also well-suited for building scalable network systems.
Roadrunner
In this tutorial, we're going to focus on Roadrunner, a high-performance PHP application server, load balancer, and process manager written in Go.
What is Roadrunner?
Roadrunner is a modern and flexible PHP application server designed for high performance. It's written in Go, which helps make it incredibly fast, lightweight, and easy to deploy.
Roadrunner supports a variety of PHP frameworks and applications, including Symfony, Laravel, and WordPress, and offers a range of features such as middleware, serverless support, plugins and connection pooling.
What this means in practice is that Roadrunner can help you juice maximum performance out of your PHP applications, with minimal effort on your part.
Your application will be able to handle more requests per second, complete each request faster (much faster) and will be able to do so with less memory and CPU usage.
This is made possible by executing your application as a long-running process, which is kept in memory. This means that your application only needs to load once, and can then handle multiple requests without having to reload.
RoadRunner leverages the power of both multiple PHP worker processes and multiple threads (inside Roadrunner) to achieve this.
For more information about Roadrunner, see the Roadrunner documentation.
Why choose Roadrunner?
You wouldn't know this without me saying so, but part of this website runs on Roadrunner.
My blog is a small site which doesn't get a huge amount of traffic (at the time of writing, I average about 5,000 clicks a month from Google) so the choice to use Roadrunner was a matter of fun and experimentation rather than necessity.
But RoadRunner is highly capable and production-ready for even the most demanding and serious business casees.
So, for my website, the actual blog frontend you're looking at now is a regular server-side rendered Symfony application running on Apache with PHP-FPM. I write my blog posts as Markdown, which are stored in a database and when I first launched the site, the same Symfony application (i.e. a monolith, albeit a very small one) would query the database, read the Markdown, convert it to HTML, then run that through a sanitizer and finally spit it out to the browser.
And for a site of this size and scale (or indeed considerably bigger), that's a perfectly cromulent way of running things.
But I wanted to see if I could make it faster, because why not?
Now, when you visit my blog, the Symfony application is only responsible for firing off a request to an API running on RoadRunner and that API is what actually does the heavy lifting of converting the Markdown to HTML, sanitizing, retrieving comments and all the rest. This response is then delivered as JSON to the main blog app which simply pipes the HTML through to a page template.
But because the Roadrunner API is a long-running process, it only needs to load once. It's then able to cache the processed blog posts in volatile memory, so that when a request comes in for a blog post, it can simply retrieve the HTML from memory and serve it up.
The average response time from the API for a blog post is now less than a millisecond, compared to probably around 30ms processing time when everything was happening in the monolith.
You can see the potential for this kind of approach in a larger application.
The best part? Not only does Roadrunner seamlessly integrate with almost any existing PHP framework or application, but it's also incredibly easy to set up and deploy.
You can even use it with serverless platforms like AWS Lambda, Google Cloud Functions, or Azure.
What we'll be building
In this tutorial, we'll be building a Symfony API application and running it via Roadrunner, a high-performance PHP application server written in Go.
But we're not going to stop there. We'll also be writing a custom Go plugin for Roadrunner to add client TLS certificate information to the request attributes, which we'll then use in the PHP sample application to authenticate the user.
The result will be a simple API, executed by Roadrunner, which will be able to authenticate users via mutual TLS.
With all the performance benefits Roadrunner brings.
Prerequisites
There are a number of prerequisites for carrying out the steps in this tutorial on a host machine environment. I've also provided a Docker package which you can use to run the tutorial in a containerized environment.
In order to run the tutorial demo via Docker, you will only need:
- Docker Desktop (available for Windows, Mac and Linux)
- Git
- OpenSSL (usually pre-installed on Linux and Mac, but you may need to install it on Windows via Git for Windows)
If you're not using Docker, to follow the tutorial steps, you will need:
- PHP (version 8.1 or higher), with the ctype, iconv, PCRE, session, SimpleXML and tokenizer extensions enabled
- Composer
- Symfony CLI
- Git
- Go
- OpenSSL
Setting up the project
With Docker
I've wrapped everything which follows in this tutorial in to a convenient Docker stack. To get started, just clone the tutorial repository and change into the directory:
git clone git@github.com:dwgebler/roadrunner-tutorial-demo.git
cd roadrunner-tutorial-demo
cd symfony/var/certs
chmod +x ./makecerts.sh
./makecerts.sh
cd ../../..
docker compose build roadrunner # you need to build the base image first
docker compose up -d
You can then visit http://localhost:8081 or https://localhost:8082 (for TLS) to see the final application running.
For the TLS version, you will need to configure your browser to trust the self-signed certificate and
to send the local client certificate. You can do this by importing the certs/client.p12 file into your browser.
Alternatively you can access the application URLs using a tool such as Postman which make it easier to configure the client certificate.
Create a new Symfony project
We'll be using the latest Symfony 6.2 for this tutorial.
Using the Symfony CLI, create a new project:
symfony new roadrunner-demo
Get the Roadrunner source code
Roadrunner is written in Go, so we'll need to install Go and then get the Roadrunner source code.
You can download Go from the Go downloads page.
Once you've installed Go, you can get the Roadrunner source code by running:
git clone git@github.com:roadrunner-server/roadrunner.git
Building the Roadrunner binary
To build the Roadrunner binary, we'll need to install the Go dependencies and then build the binary.
Just change into the roadrunner directory and run:
go mod download
go mod tidy
CGO_ENABLED=0 go build -trimpath -ldflags "-s" -o ./rr ./cmd/rr/main.go
This will build the Roadrunner binary and place it in the roadrunner directory, as an
executable file called rr.
Create a test PHP script
Before we dive in to Symfony, TLS and Roadrunner, let's just make sure that we can get Roadrunner to run a simple PHP script.
Create a new directory called testapp or whatever you like, and then create a new file called server.php in that directory.
Roadunner operates off a worker model, so the entrypoint for a PHP application will crate a worker which is able to listen for PSR-7 requests and respond to them.
Install the required dependencies via Composer:
composer require spiral/roadrunner nyholm/psr7
Next, in the server.php file, add the following code:
<?php

use Spiral\RoadRunner;
use Nyholm\Psr7;

include "vendor/autoload.php";

$worker = RoadRunner\Worker::create();
$psrFactory = new Psr7\Factory\Psr17Factory();

$psr7 = new RoadRunner\Http\PSR7Worker($worker, $psrFactory, $psrFactory, $psrFactory);

while (true) {
    try {
        $request = $psr7->waitRequest();

        if (!($request instanceof \Psr\Http\Message\ServerRequestInterface)) {
            break;
        }
    } catch (\Throwable) {
        $psr7->respond(new Psr7\Response(400));
        continue;
    }

    try {
        $psr7->respond(new Psr7\Response(200, [], 'Hello RoadRunner!'));
    } catch (\Throwable) {
        $psr7->respond(new Psr7\Response(500, [], 'Something Went Wrong!'));
    }
}
Configure the Roadrunner server
In the same directory as this test script, create a new file called .rr.yaml.
This is the name of the default configuration file Roadrunner will use to run our application.
server:
  command: "php server.php"

http:
  address: 0.0.0.0:8080
  pool:
    num_workers: 1
Run the Roadrunner server
To start the Roadrunner server and spin up our test script, go back to the roadrunner directory and run:
./rr serve -c /path/to/testapp/.rr.yaml
You can of course also either copy the rr binary to the testapp directory, or add the roadrunner directory to your PATH environment variable,
or copy the rr binary to /usr/local/bin, etc.
Now visit http://localhost:8080 in your browser and you should see the following:

In your terminal, you can terminate the Roadrunner server by pressing Ctrl+C.
If you want to run the Roadrunner server in the background, you can use the -d flag:
./rr serve -c /path/to/testapp/.rr.yaml -d
Set up our Symfony application
Install the Symfony Roadrunner runtime
Now we've got a very simple test script being served by Roadrunner, let's set up our Symfony application.
Navigate back to your Symfony project directory and run:
composer require security runtime/roadrunner-symfony-nyholm
Now edit your project's .env file and add the following:
APP_RUNTIME=Runtime\RoadRunnerSymfonyNyholm\Runtime
This will tell Symfony to use the Roadrunner runtime.
The Nyholm runtime is very simple under the hood, looking quite similar in essence to the test script we created earlier. The major difference is this runtime package uses the Symfony PSR-7 bridge to convert incoming PSR-7 requests to Symfony requests and Symfony responses to PSR-7 responses.
It runs the Symfony requests through your application kernel and takes care of firing the kernel's terminate event at the end of the request.
Check your project's public/index.php file and make sure it looks like this:
<?php

use App\Kernel;

require_once dirname(__DIR__).'/vendor/autoload_runtime.php';

return function (array $context) {
    return new Kernel($context['APP_ENV'], (bool) $context['APP_DEBUG']);
};
If it doesn't, you can copy the above code into your public/index.php file.
Configure the Roadrunner server
Now we need to configure the Roadrunner server to run our Symfony application.
Create a new file called .rr.yaml in the root of your Symfony project, same as we
did for the test script earlier.
server:
  command: "php public/index.php"
  env:
    - APP_ENV: "dev"
    - APP_RUNTIME: Runtime\RoadRunnerSymfonyNyholm\Runtime

http:
  address: 0.0.0.0:8081
  pool:
    num_workers: 1
Add a sample API endpoint
Create a new file called src/Controller/ApiController.php and add the following code:
<?php

namespace App\Controller;

use Symfony\Bundle\FrameworkBundle\Controller\AbstractController;
use Symfony\Component\HttpFoundation\JsonResponse;
use Symfony\Component\Routing\Annotation\Route;

class ApiController extends AbstractController
{
    #[Route('/api', name: 'app_api')]
    public function index(): JsonResponse
    {
        return $this->json([
            'message' => 'Welcome to the API!',
            'user' => $this->getUser()->getUserIdentifier(),
        ]);
    }
}
We'll add some authentication and TLS information to the JSON which comes back from this endpoint in the next section.
Configure security
We'll be using the Symfony security component to authenticate our API requests.
We'll also use the built-in X.509 authenticator which authenticates users based on the certificate information passed to the application.
As always with mutual TLS, it is our server (in this case Roadrunner) which is actually responsible for requesting and verifying the client certificate. Symfony's X.509 authenticator here will only be responsible for translating the certificate information into a user object.
Open up your project's config/packages/security.yaml file and add the following minimal configuration:
security:
    password_hashers:
        Symfony\Component\Security\Core\User\PasswordAuthenticatedUserInterface: 'auto'

    providers:
        users_in_memory:
            # We won't bother with a real database for this example...
            memory:
                users:
                    # Password is "admin"
                    admin: { password: '$2y$10$4Z0uMrDo/gxVnKOcWpo0qufjRbe6RcOE2bzMfBQeg6cLv5BDV/VfK', roles: [ 'ROLE_ADMIN' ] }
                    # Password is "user"
                    user1: { password: '$2y$10$sua6eerALf6PWZzgIFu8w.YUzyKKoA5cWSo9Dmp7hFWboq0uj.rZq', roles: [ 'ROLE_USER' ] }
    firewalls:
        dev:
            pattern: ^/(_(profiler|wdt)|css|images|js)/
            security: false
        main:
            stateless: true
            lazy: true
            provider: users_in_memory
            x509:
                provider: users_in_memory

    role_hierarchy:
        ROLE_ADMIN: ROLE_USER

    access_control:
        - { path: ^/api, roles: ROLE_USER }
Create the TLS middleware
The Symfony documentation tells us how the X.509 authenticator tries to derive a logged-in user from the certificate information passed to the application:
First, it tries the SSL_CLIENT_S_DN_Email server parameter, which is exposed by Apache;
If it is not set (e.g. when using Nginx), it uses SSL_CLIENT_S_DN and matches the value following emailAddress=.
Of course, Roadrunner is neither Apache nor Nginx, and it doesn't expose any of these parameters to the PHP environment. So we need to create a middleware which will extract the certificate information from the request attributes, where we'll be adding the required information in our custom plugin for Roadrunner.
We'll do this using an event subscriber which listens to the KernelEvents::REQUEST event.
Create a new file called src/EventSubscriber/TlsSubscriber.php and add the following code:
<?php

namespace App\EventSubscriber;

use Symfony\Component\EventDispatcher\EventSubscriberInterface;
use Symfony\Component\HttpKernel\Event\RequestEvent;
use Symfony\Component\HttpKernel\KernelEvents;

class TlsSubscriber implements EventSubscriberInterface
{
    public static function getSubscribedEvents(): array
    {
        return [
            KernelEvents::REQUEST => ['onKernelRequest', 10],
        ];
    }

    public function onKernelRequest(RequestEvent $event): void
    {
        $request = $event->getRequest();
        $certificateSubject = $request->attributes->get('certificate_subject', '');
        // Extract the username from the Common Name in the certificate subject
        $cn = preg_match('/CN=([^,]+)/', $certificateSubject, $matches) ? $matches[1] : null;
        // And set the server key which will be checked by the X.509 authenticator
        if ($cn) {
            $request->server->set('SSL_CLIENT_S_DN_Email', $cn);
        }
    }
}
Build Roadrunner with our TLS plugin
Before we can go any further, we need a build of Roadrunner which will provide this certificate_subject
property in the request attributes.
We'll accomplish this by building a plugin for Roadrunner which will check if the connection making a request is using TLS, and if so, extract the certificate information from the connection, finally adding it to the request attributes.
Create the plugin
Create a new directory called tlsattr on a new path, outside the Roadrunner source, test script and
Symfony project directories.
Within this directory, create:
- a new file called
go.mod - a subdirectory also called
tlsattrand inside there, a new file calledtlsattr.go
The go.mod file should contain the following:
module github.com/dwgebler/attr

go 1.20

require github.com/roadrunner-server/http/v4 v4.1.5

require (
	github.com/roadrunner-server/errors v1.2.0
	github.com/roadrunner-server/sdk/v4 v4.2.0
	github.com/roadrunner-server/tcplisten v1.3.0
)
You can replace the github.com/dwgebler part with your own GitHub username if you wish - the
repo doesn't need to exist, since in Roadrunner itself we'll replace this reference with a
local path.
The tlsattr.go file should contain the following:
package tlsattr

import (
	"encoding/json"
	"net/http"

	"github.com/roadrunner-server/http/v4/attributes"
	"go.uber.org/zap"
)

const PluginName = "tls-attributes"

type Plugin struct{}

func (p *Plugin) Init() error {
	return nil
}

func (p *Plugin) Middleware(next http.Handler) http.Handler {
	return http.HandlerFunc(func(w http.ResponseWriter, r *http.Request) {
		r = attributes.Init(r)
		attributes.Set(r, "HTTPS", false)
		if r.TLS != nil {
			attributes.Set(r, "HTTPS", true)
			if len(r.TLS.PeerCertificates) > 0 {
				cert, err := json.Marshal(r.TLS.PeerCertificates[0])
				if err != nil {
					zap.L().Error("failed to marshal certificate", zap.Error(err))
				} else {
					attributes.Set(r, "certificate", string(cert))
					attributes.Set(r, "certificate_subject", r.TLS.PeerCertificates[0].Subject.String())
				}
			}
		}
		next.ServeHTTP(w, r)
	})
}

func (p *Plugin) Name() string {
	return PluginName
}
Build Roadrunner with the plugin
Now we need to build a version of Roadrunner which includes this plugin.
Jump back in to your clone of the Roadrunner source code and open the go.mod file.
Add the following line just before the require section:
// replace ../attr with the path to your plugin directory
// replace dwgebler with your own GitHub username if you changed it in the plugin code above
replace github.com/dwgebler/tlsattr => ../tlsattr
This tells Go to use the local version of the plugin instead of trying to download from GitHub.
Then add the following line inside the require section:
github.com/dwgebler/tlsattr v0.0.0
What we've done here is add our plugin package as a dependency of Roadrunner.
What we need to do next is tell Roadrunner to load this plugin and make it available.
Open the plugins.go file found inside the container directory of the Roadrunner source and add the following line to the import section:
"github.com/dwgebler/tlsattr/tlsattr"
Then add &tlsattr.Plugin{}, as a line to the Plugins function, so it looks like this:
func Plugins() []any {
	return []any{
		&tlsattr.Plugin{},
		// remainder of code omitted
Now we can build Roadrunner with our plugin.
Build Roadrunner
To build Roadrunner, we need to run the same command we used to build it earlier.
go get github.com/dwgebler/tlsattr
go mod tidy
CGO_ENABLED=0 go build -trimpath -ldflags "-s" -o ./rr ./cmd/rr/main.go
Create TLS certificates
The last thing we need to put this all together is a self-signed Certificate Authority (CA), a certificate signed by that CA for the server to use, and a certificate signed by the CA for the client to use.
Back in your Symfony project directory, in the var subdirectory, create a new directory called certs.
I've written a script below which will use OpenSSL to generate all required keys and certificates for you.
You can either run these commands directly, or copy the following in to a makecerts.sh shell script and
execute it inside the certs directory.
echo "Generating CA..."
openssl req -x509 -new -nodes -keyout ca.key -sha256 -days 1825 -out ca.crt -subj "/C=GB/ST=/L=/O=/OU=/CN=localhost-ca/emailAddress="
echo "Generating key..."
openssl genrsa -out localhost.key -passout pass:foobar  2048
echo "Generating cert..."
openssl req -new -key localhost.key -passin pass:foobar -out localhost.csr -addext "subjectAltName = DNS:localhost" -subj "/C=GB/ST=/L=/O=/OU=/CN=localhost/emailAddress="
cat <<EOT >> localhost.ext
authorityKeyIdentifier=keyid,issuer
basicConstraints=CA:FALSE
keyUsage = digitalSignature, nonRepudiation, keyEncipherment, dataEncipherment
subjectAltName = @alt_names
[alt_names]
DNS.1 = localhost
EOT
openssl x509 -req -in localhost.csr -CA ca.crt -CAkey ca.key -CAcreateserial -out localhost.crt -days 365 -sha256 -extfile localhost.ext
echo "Generating client key..."
openssl genrsa -out client.key -passout pass:foobar  2048
echo "Generating client cert..."
openssl req -new -sha256 -key client.key -passin pass:foobar -out client.csr -subj "/C=GB/ST=/L=/O=/OU=/CN=user1/emailAddress=user@localhost"
openssl x509 -req -in client.csr -CA ca.crt -CAkey ca.key -CAcreateserial -out client.crt -days 365 -sha256
openssl pkcs12 -export -out client.p12 -in client.crt -inkey client.key -passin pass:foobar -passout pass:foobar
echo "Done."
The generate file client.p12 is the client certificate in PKCS12 format, which you can import in to
your browser to test the client certificate authentication.
I won't provide instructions on importing client certificates in to your browser (or you can use a tool such as Postman if you prefer) as this varies between browsers and operating systems, but you can find instructions online easily enough.
Putting it all together
We can now use our freshly built, plugin-enabled rr binary to serve our Symfony application over HTTPS.
We just need to add a little more configuration to the Symfony app's .rr.yaml file.
Open up your configuration file and change it to look like this:
server:
  command: "php public/index.php"
  env:
    - APP_ENV: "dev"
    - APP_RUNTIME: Runtime\RoadRunnerSymfonyNyholm\Runtime

http:
  middleware:
    - "tls-attributes"
  address: 0.0.0.0:8081
  pool:
    num_workers: 1
  ssl:
    address: 0.0.0.0:8082
    redirect: false
    cert: var/certs/localhost.crt
    key: var/certs/localhost.key
    root_ca: var/certs/ca.crt
    client_auth_type: require_and_verify_client_cert
This tells Roadrunner to make HTTPS available on port 8083 (alongside plain HTTP on 8081) and to both require and verify a valid client certificate before letting the request through.
Fire up Roadrunner for our Symfony application:
./rr serve -c /path/to/symfony/.rr.yaml
Try to visit http://localhost:8081/api in your browser.
You should see a Symfony error page in response:

This is because without HTTPS and a valid client certificate, we cannot be authenticated inside the application.
Now, after importing the client.p12 certificate in to your browser, try visiting https://localhost:8082/api in your browser.
You should see a JSON response from the Symfony application:
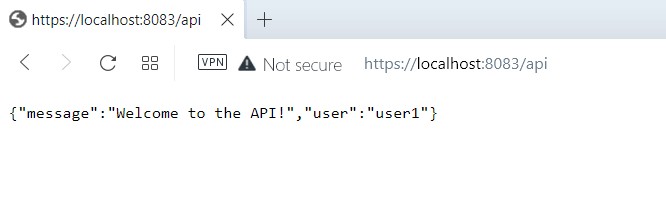
We have successfully authenticated in our Symfony application using our customized Roadrunner plugin!
Conclusion
In this article, we've learned what Roadrunner is, how to build the binary, how to build a custom plugin for Roadrunner, and how to use that plugin to authenticate a Symfony application using client certificates.
You can easily adapt this example to use with any PHP application, and you can also run your Roadrunner server as a service via systemd or similar.
There is much more to Roadrunner than we've covered here, but I hope this is a good place to get you started.
If you have any questions, please feel free to reach out to me by email, or leave a comment below.
Comments (2)
Hey, nice article :) BTW, you may use
veloxto build RR with your custom plugin w/o cloning it:Hey you did an amazing work here! Thank you for all the information. I have been struggling to find a way to scale PHP projects. I will be trying this!
Leave a Comment